
Symbology
How map symbology is applied in Riverscapes Viewer
One of the most important Riverscapes Viewer features is adding a curated layer to the map symoblized as it was intended by the model or project type owner. This is a feature of all flavors of the Viewer (Arc Viewer, QViewer and Web Viewer). Unfortunately, each has different standards for how symbology is saved. This page is for power-users or Project-Type Curators to customize and implement consistent symbology across all three platforms.
By default the Viewer adds layers to the map document using the default symbology. Rasters are added with a greyscale and vectors with a single symbol using a random color.
You can override this behavior and apply specific symbology to different types of layers. For example you can use one raster symbolology for DEMs and another for vegetation. The Viewer does this using layer files in ArcGIS and QML files in QGIS.
Business Logic & Symbology Keys
The same business logic is used in all three flavors of RAVE. Each layer within a riverscapes project tree has a symbology key associated with it. We use the same keys to point to different layer files in each. These keys define the generic type of layer in question and they are used to pick which symbology to apply when adding the layer to the map. Examples might be "DEM", "Soil" or "Vegetation".
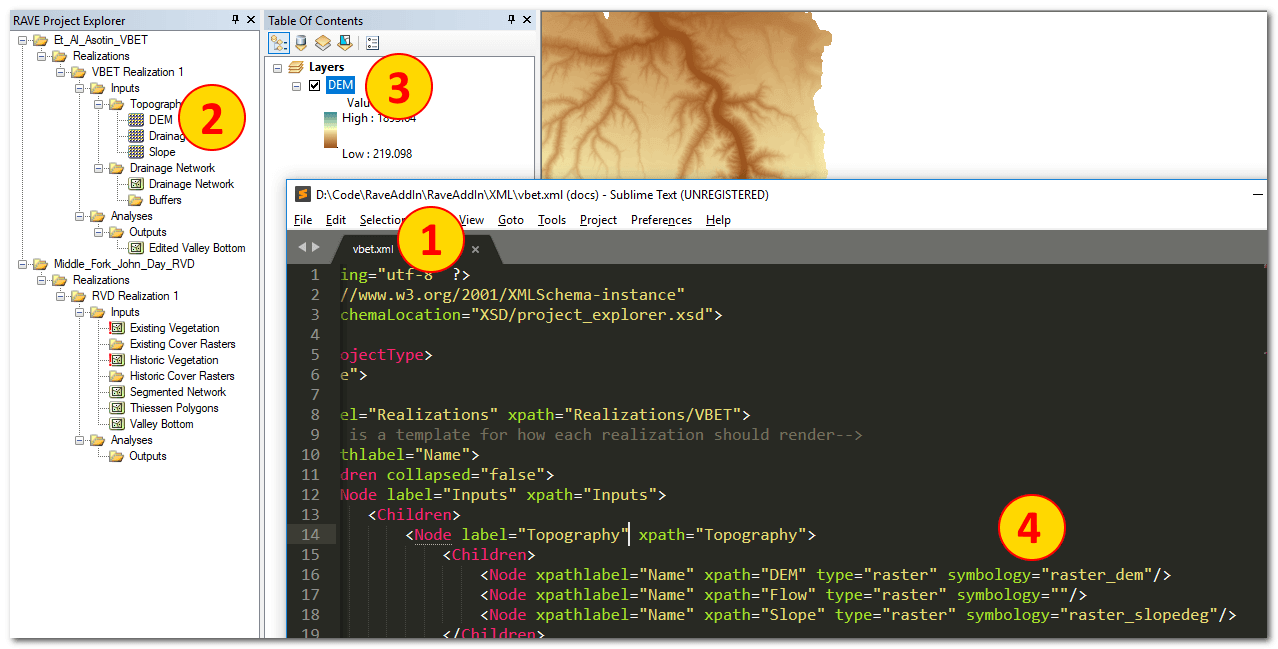
The symbology keys are defined in the business logic XML that is used to load the Riverscapes project into the project explorer. In the illustration below the VBET.xml business logic file (1) defines a node in the tree for the DEM input (2) that when RAVE attempts to add the layer to the ArcMap table of contents (3) it uses the symbology key of raster_dem (4).
Where RAVE Looks for Layer Files
You can add any GIS layer to the current ArcMap document by right clicking and choosing Add to Map. Alternatively you can choose Add All Layers To The Map by right clicking on any higher up branch of the project tree. RAVE then looks for a file with the same name as the symbology key associated with that layer type. The Viewer looks in five places in a very specific order. The first file with the name that matches the symbology key of the layer is used to symbolize the layer as it is added to the current ArcMap document. The file locations are:
| Search Folder | Example |
|---|---|
| Adjacent to the parent riverscapes project file. | D:\MyProjects\ProjectX\dem.lyr |
%APPDATA%\RAVE\Symbology\<model_name>\<symbology_key>.lyr | %APPDATA%\RAVE\Symbology\BRAT\dem.lyr |
%APPDATA%\RAVE\Symbology\Shared\<symbology_key>.lyr | %APPDATA%\RAVE\Symbology\Shared\dem.lyr |
<rave_install>\Symbology\<Model>\<symbology_key>.lyr | Hidden folder |
<rave_install>\Symbology\Shared\<symbology_key>.lyr | Hidden folder |
The easiest and first way to experiment with symbolizing layers is to generate a layer file and put it adjacent to the Riverscapes project. Once you're comfortable with the symbology then you can move the file into your %APPDATA%\RAVE location.
Notice above how the Viewer first looks next to the project for layer files that only apply to that project. Next it looks in the AppData folder for layer files that are specific to the project type in question (BRAT in the example above). Next it looks for generic layer files that are shared across all project types. Finally the Viewer looks in the set of layer files that are shipped with the software, of which there are none currently. However we plan to start including generic layer files for common layer types in the near future.
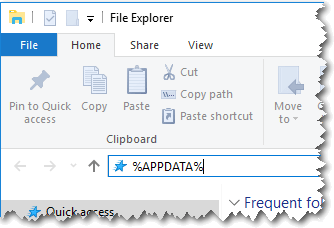
Where Is my APPDATA folder?
APPDATA is a shortcut to a special folder on your computer where applications can store configuration information. Typically it refers to the path C:\<your_user_name>\AppData\Roaming. This folder might be hidden and not visible by default but you can always browse to it regardless. You can reach this folder by opening Windows Explorer and entering the text %APPDATA% into the address bar.
Remember to put your symbology information under a folder called RAVE\Symbology. This folder will not be present automatically. You have to create it!
Symbology Files
Riverscapes Viewer for QGIS
How-to Create a QGIS Layer File (*.qml)
How-to Convert from a *.lyr to a *.qml
ArcRAVE
ESRI Layer files contain two bits of information. First they possess a path to a specific GIS dataset on your computer and second they store the definition of how the dataset should be symbolized. RAVE only uses the latter and ignores the path to the dataset itself. In this way RAVE can apply the symbology stored in a single layer file to many layers of the same type. See the video demonstration below to see for how all of this works.
ArcRAVE - How To Create a Layer (*.lyr) File
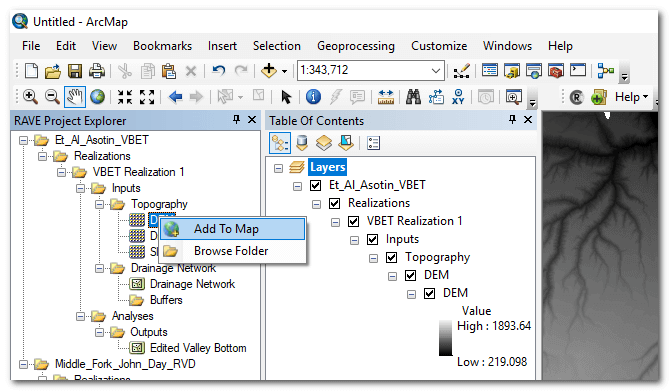
- Add the layer in question to the current ArcMap document. You can do this using RAVE or using the typical ArcMap features to Add Data.
- Use ArcMap to symbolize the layer how you want it to appear for RAVE layers. Remember that depending on where you place this layer file (see below) this symbology might be applied more than just the layer in question. Configure the symbology accordingly. For example, if you are configuring a percent slope layer but the current layer only contains slopes up to 20%, be sure to extend the symbology classification all the way up to 90% in case this symbology is used for layers with a different range.
- Right click on the layer in the ArcMap table of contents and choose
Save As Layer File...Be sure to save it in the right location according to how you want RAVE to use the layer file (see previous section).
